Troubleshooting Android Emulator: “Emulator: Process finished with exit code 1”

Emulator: Process finished with exit code 1

You opened AVD Manager in Android Studio and tried to start an AVD, you got
“Emulator: Process finished with exit code 1”. Following are the steps to debug
this

  1. Find out the name of the emulator.
    Click the down arrow 🔽 which is to the right of play arrow ▶️, to find out the name of the AVD. Let’s say the name is “Nexus_5X_API_28_x86”.
  2. Try starting the AVD directly from command-line
    It fails with another cryptic error, but that’s at least more actionable

    $(dirname $(which android))/emulator -avd Nexus_5X_API_28_x86
    ...
    PANIC: Broken AVD system path. Check your ANDROID_SDK_ROOT value [/opt/android_sdk]!

    Let’s retry in the verbose mode to see a detailed error

    $(dirname $(which android))/emulator -avd Nexus_5X_API_28_x86 -verbose
    ...
    Not a directory: /opt/android_sdk/system-images/android-28/google_apis/x86/
    

    So, the system image is missing.

  3. Install system image
    # List all possible system images.
    $(dirname $(which android))/bin/sdkmanager --list
    # List the images we are interested in.
    $(dirname $(which android))/bin/sdkmanager --list | ack google_apis | ack android-28 | ack x86
    # Install the right one using
    $(dirname $(which android))/bin/sdkmanager --install 'system-images;android-28;google_apis;x86'
    
  4. Now try starting the AVD again.
    $(dirname $(which android))/emulator -avd Nexus_5X_API_28_x86 -verbose
    ...
    emulator:Probing program: /opt/android_sdk/tools/emulator64-x86
    emulator:Probing program: /opt/android_sdk/tools/emulator-x86
    PANIC: Missing emulator engine program for 'x86' CPU.
    

    Turns out there is another version of the emulator installed in $(dirname $(dirname $(which android)))/emulator/emulator. And the emulator I was using is a stray one.

    # This works
    $(dirname $(dirname $(which android)))/emulator/emulator -avd Nexus_5X_API_28_x86 -verbose
    

Circle CI vs Travis CI

Update: As of Mar 2022, I recommend everyone to use GitHub Actions

I maintain a somewhat popular Android developer tool (adb-enhanced). The tool is written in Python, supporting both Python 2 and 3. Testing the tool requires both Python runtime as well a running Android emulator. I, initially, used Travis CI for setting up continuous testing of this tool. Later, I felt that Travis CI was too slow and when I came across Circle CI, I decided to give it a try. As of now, both Travis and Circle CI are used for testing. Here is what I learned from my experience.

Read More

Android: Fragment related pitfalls and how to avoid them

  1. Don’t use platform fragments (android.app.Fragment), they have been deprecated and can trigger version-specific bugs. Use the support library fragments (android.support.v4.app.Fragment) instead.
  2. A Fragment is created explicitly via your code or recreated implicitly by the FragmentManager. The FragmentManager can only recreate a Fragment if it’s a public non-anonymous class. To test for this, rotate your screen while the Fragment is visible.
  3. FragmentTransaction#commit can fail if the activity has been destroyed.
    “java.lang.IllegalStateException: Activity has been destroyed”
    Why – This can happen in the wild where say right before FragmentTransaction#commit() executes, the user gets a phone call and your activity is backgrounded and destroyed.
    How to trigger manually – The easy way to manually test this is to add a call to Activity#finish() right before FragmentTransaction#commit.
    Fix – Before doing FragmentTransaction#commit(), check that the activity has not been destroyed –Activity#isDestroyed() should return false.
  4. FragmentTransaction#commit can fail if onSaveInstanceState has been called.
    “java.lang.IllegalStateException: Can not perform this action after onSaveInstanceState”
    Why – This can happen in the wild where say right before FragmentTransaction#commit() executes, the user gets a phone call and your activity is backgrounded and paused.
    How to trigger manually – The easiest way to manually trigger this behavior is to call Activity#onSaveInstanceState in your uncommitted code right before the call to FragmentTransaction#commit
    Fix 1 – call FragmentTransaction#commitAllowingStateLoss but that implies that your fragment would be in a different state then the user expects it to be.
    Fix 2 – The better way is to ensure that the code path L which leads to FragmentTransaction#commit is not invoked once Activity’s onSaveInstanceState has been called but that’s not always easy to do.
  5. FragmentManager is null after Activity is destroyed.
    “java.lang.NullPointerException: … at getSupportFragmentManager().beginTransaction()”
    Why – This can happen when the activity has been destroyed before getSupportFragmentManager() is invoked. The common cause of this is when a new fragment has to be added in response to a user action and the user immediately backgrounds the app, again, say due to a phone call, after clicking the button before getSupportFragmentManager() is invoked. Another common case is where an AsyncTask which will call getSupportFragmentManager() in onPostExecute and while the task is engaged in the background processing (doInBackground), the activity is destroyed.
    How to trigger manually – call `Activity#finish()` before `getSupportFragmentManager().beginTransaction()`
    Fix – If getSupportFragmentManager() is being invoked in the Activity, check if it’s null. If it is being invoked inside a Fragment check if isAdded() of the Fragment returns true before calling this.
  6. Avoid UI modifications which are not related to a FragmentTransaction with FragmentTransaction committed using commitAllowStateLoss
    Why – Any UI modifications like modifications of the text in a TextView are synchronous while the execution of a FragmentTransaction via `FragmentTransaction#commitAllowStateLoss()` is asynchronous. If the activity’s onSaveInstanceState is invoked after the UI changes have been made but before commitAllowStateLoss is called then the user can end up seeing a UI state which you never expected them to see.
    Fix – use commitNow() or hook into FragmentManager.FragmentLifecycleCallbacks#onFragmentAttached(). I will admit this I haven’t found a simpler fix for this. And this issue is definitely an edge case.
  7. Saving Fragment State
    As mentioned earlier, a Fragment is re-created on activity recreation by FragmentManager which will invoke it’s default no-parameter constructor. If you have no such constructor then on Fragment recreation, the app will crash with “java.lang.InstantiationException: MyFragment has no zero argument constructor”. If you try to fix this by adding a no argument constructor then the app will not crash but on activity recreation say due to screen rotation, the Fragment will lose its state. The right way to serialize a Fragment’s state is to pass arguments in a Bundle via setArguments.

    MyFragment myFragment = new MyFragment();
    myFragment.setArguments(mBundle);
    return myFragment;
    

    The Fragment code should then use getArguments() method to fetch the arguments. In fact, I would recommend a Builder pattern to hide all this complexity.

    Consider this complete example,

    public class MyFragment {
    	
    		private static final String KEY_NAME = "name";
    	
    		public static class MyFragment.Builder {
    		   private final Bundle mBundle = new Bundle();
    		   
    		   public Builder setName(String username) {
    		       mBundle.putInt(KEY_NAME, clickCount);
    		       return this;
    		   }
    		   
    		   public MyFragment build() {
    		      MyFragment myFragment = new MyFragment();
    		      // Set the username
    		      myFragment.setArguments(mBundle);
    		      return myFragment;
    		   }
    		}
    		
    		public MyFragment() {
    			// Get the user name
    			@Nullable String username = getArguments() != null ? getArguments().getString(KEY_NAME, null) : null;
    		}
    	}
    	
    	if (!isDestroyed()) {
    	   // Create the Fragment
    		MyFragment myFragment = new MyFragment().Builder().setName(username).build();
    		// Add the Fragment
    		FragmentTransaction ft = getSupportFragmentManager().beingTransaction();
    		ft.add(myFragment);
    		ft.commitNowAllowingStateLoss();
    	}
  8. Inside your Fragment code, if you want to decide whether it is safe to execute a UI code or not, rely on isAdded(), if it returns true, it is safe to perform UI modifications, if it returns false, then your Fragment has been detached from the activity either because it has been removed or because the host (Fragment/Activity) is being destroyed.
  9. Callbacks
    To callback into the parent activity/fragment in case of action inside your Fragment, say, a user click, provide an interface (say, MyFragmentListener) which the holding activity/Fragment should implement. In Fragment#onCreateView() get the host via getHost(), cast it to MyFragmentListener, and store it in the instance variable of your Fragment class. Set that instance variable to null in Fragment#onDestroyView(). Now, you can invoke callbacks on this MyFragmentListener instance variable.
  10. Backstack
    Backstack is nuanced and my grasp of it is still limited. What I do understand is that if you want your Fragment to react to the back key press then you should call FragmentTransaction#addToBackStack(backStackStateName) while adding the Fragment via FragmentTransaction and remove it while removing it. Removal from the back stack is a bit more nuanced. Note that, manual removal of a fragment from the back stack is not required in Activity#onBackPressed() as long as your Activity inherits from FragmentActivity.

    SupportFragmentManager manager = getSupportFragmentManager();
    	FragmentManager.BackStackEntry entry = manager.getBackStackEntryAt(manager.getBackStackEntryCount() - 1);
    	if (backStackStateName.equals(entry.getName())) {
    	   manager.popBackStack(backStackStateName, FragmentManager.POP_BACK_STACK_INCLUSIVE);
    	}
    }


Android: Handling JPEG images with Exif orientation flags

A JPEG file can have Exif metadata which can provide the rotation/translation field information for a raw JPEG image. So, a landscape raw JPEG image could actually be a portrait because it’s EXIF orientation could be set to ORIENTATION_ROTATE_90, the best way to handle such scenarios is to either use a library like Picasso or Glide or at least learn from them. Here is a piece of code from Picasso which loads a JPEG as an in-memory bitmap and performs the right translation/rotation.

// Get the orientation
ExifInterface exifInterface = new ExifInterface(imageFilePath);
int exifOrientation = exifInterface.getAttributeInt(TAG_ORIENTATION, ORIENTATION_NORMAL)

// Take the source of these methods from 
// https://github.com/square/picasso/blob/31779ac2cb971c4534cc17bd437fab1aa0083d3d/picasso/src/main/java/com/squareup/picasso3/BitmapHunter.java#L625-L659
int exifRotation = getExifRotation(exifOrientation);
int exifTranslation = getExifTranslation(exifOrientation);

Matrix matrix = new Matrix();
if (exifRotation != 0) {
  matrix.preRotate(exifRotation);
}
if (exifTranslation != 1) {
  matrix.postScale(exifTranslation, 1);
}

// Now use this matrix to create a new Bitmap from the existing Bitmap


Cross-language bridge error handling: JS-to-Java Example

All languages have certain semantics for dealing with error cases. C deals with them by setting error codes. Java deals with them by throwing exceptions. JavaScript deals with them by throwing exceptions as well but unlike Java, it does have any concept of checked Exceptions. The JS interpreter just stops. And this has some interesting implications in hybrid scenarios like a Webview based app.

Consider a simple Android app where most of the code is in JavaScript but is making a request to Java layer.

<html>
    <head/>
    <!-- Invoke getContacts() on the Javascript bridge object referenced via “JsInterface” tag on click -->
    <Button onClick='ContactJsInterface.getContacts()'>Click me</Button>
</html>
// MainActivity in Kotlin
class MainActivity : AppCompatActivity() {

  override fun onCreate(savedInstanceState: Bundle?) {
        ....
        // Load the above string into webview
        webView.loadDataWithBaseURL("about:blank", htmlPage, "text/html", null, null)
        webView.settings.javaScriptEnabled = true
        // Add a WebkitJsInterface object and tag it with "ContactJsInterface", so that,
        // JsInterface.getContacts maps to WebKitJsInterface.getContacts
        webView.addJavascriptInterface(WebkitJsInterface(this), "ContactJsInterface")
    }
}
// The Javascript interface object in Kotlin
class WebkitJsInterface(context: Context) {
    private val mContext = context

    // ContactJsInterface.getContacts() maps to this method
    @JavascriptInterface
    fun getContacts() {
        mContext.contentResolver.query(
            ContactsContract.Contacts.CONTENT_URI,
            null, null, null, null)
    }
}


After starting the app, check that the READ_CONTACTS is revoked or revoke it with adbe

adbe permissions revoke net.ashishb.jstojavademo contacts

Now, when you click the “Click me” button, you will see a SecurityException in the logs but the app won’t crash. If you check Thread’s name via Thread.currentThread().name, it will return JavaBridge. It seems any Exception thrown on this thread is simply swallowed. This won’t show up in analytics or crash log reports. Your Javascript code on return simply won’t be executed. And your app will appear unusable. This is worse than crashes. crashes at least give the app a chance to get out of a bad state.

This is worse than crashes. crashes at least give the app a chance to get out of a bad state.

Remedy

Sending error information across languages is hard. At the bare minimum, every such call should be encapsulated with a try-catch which catches Exception. For severe unexpected errors, it might not be bad to let the app crash, as you would, while writing the Java code.

@JavascriptInterface
fun getContacts() {
    try {
        getContactsUnsafe()
    } catch (e : Exception) {
        if (isSevereException(e)) {
            rethrowOnMainThread(e)
        } else {
            logError(e)
        }
    }
}

private fun logError(e: Exception) {
    Log.e("WebkitJsInterface", "Error occurred", e)
}

private fun rethrowOnMainThread(e: Exception) {
    Handler(Looper.getMainLooper()).post { throw e }
}

private fun getContactsUnsafe() {
    mContext.contentResolver.query(
        ContactsContract.Contacts.CONTENT_URI,
        null, null, null, null
    )
}


Full code for this blog post is posted on Github

Testing resumable uploads

The core idea behind resumable upload is straightforward if you are uploading a big file, then you are going to encounter users in the network conditions where they cannot upload the file in a single network session. The client-side code, to avoid restarting the file upload from the beginning, must figure out what portion of the file was uploaded and “resume” the upload of the rest.

How to do resumable upload

Before starting the upload, send a unique ID generated from the file contents to the server like MD-5 or SHA-256. The server decides and declares what the format of that unique ID is. Next, the server responds with an offset which indicates how many bytes server already has. The client uploads rest of the bytes with a Content-Range header.

How to test resumable upload

The right way to verify that this code works is to break the upload intentionally and randomly in the middle and check that the next upload session does not start from zero. Note that, it might not start from the exact byte offset where it was disconnected since the client network stack can have its buffer size to fill and it might discard the buffered bytes in case of an exception.  Therefore, the ratio of the number of bytes read to the file size should be close to one but might not be one.

The right way to verify that this code works is to break the upload intentionally and randomly in the middle and check that the next upload session does not start from zero.

Sample skeleton codes

// SHA-256 or MD-5 whatever the server decides
String uniqueId = generateUniqueId(File file);
// Number of already uploaded bytes (could be zero)
int alreadyUploaded = getAlreadyUploadedByteCount(uniqueId);
// Upload rest of the bytes
upload(file, uniqueId, alreadyUploaded);

boolean upload(File file, String uniqueId, int alreadyUploaded)
 throws IOException {
  InputStream in = getInputStream(file);
  uploadViaHttp(file, uniqueId, alreadyUploaded);
}
int readCount;

boolean upload(File file, String uniqueId, int alreadyUploaded) 
throws IOException {
  InputStream in = getInputStream(file);
  readCount = 0;  // Testing only
  uploadViaHttp(in, uniqueId, alreadyUploaded);
  double ratio = ((double)readCount)/file.size();  // Testing only
}


// Standard method
InputStream getInputStream(File file) throws IOException {
    return new FileInputStream(file);
}

// Enhanced method for testing
InputStream getInputStream(File file) throws IOException {
    return new FileInputStream(file) {
        int read(byte[] b, int off, int len) throws IOException {
            if (random.nextBoolean()) {
                throw new IOException("Intentionally broke the stream");
            }
            int tmp = super.read(b, 0, b.length());
            readCount += tmp;
            return tmp;
        }

        int read(byte[] b) throws IOException {
            return read(b, 0, b.length);
        }

        int read() throws IOException {
            readCount++;
            return super.read();
        }
    }
}


Google I/O 2018: Android Notes

Highlights

  1. All android support library code is moving to the androidx namespace. No more android.support.v4 or android. support.v7 namespaces.
  2. Android app bundle to split the app into downloadable modules
  3. Navigation library to set up navigation between different activities/fragments.
  4. Use WorkMananger for background work – this is an improvement to JobScheduler
  5. Major improvements to Android Studio. Most standalone tools were deprecated in favor of adding the same functionality into Android Studio.
  6. Major improvements to Android Vitals which in Google Play to learn more about what’s going on with the Android app’s performance.
  7. Android P does more profiling to improve code locality for faster execution.

Modern Android Development

  1. hierarchy viewer is replaced by ViewTree in Android Studio
  2. TraceView is replaced by Systrace in Android Studio
  3. Profiler (DDMS) is replaced by Android Profiler in Android Studio
  4. Dalvik is replaced by ART
  5. Java is replaced by Kotlin as a preferred language
  6. Layouts
    1. Absolute Layout – deprecated
    2. Linear Layout – still OK
    3. Frame Layout – still OK
    4. Grid Layout – discouraged
    5. Relative Layout – discouraged
    6. ConstraintLayout – recommended
  7. ListView, GridView, and Gallery are deprecated. RecyclerView is recommended with ListAdapter for updations.
  8. Platform Fragments (android.app.fragments) are deprecated. Support library fragments are recommended.
  9. Single activity app recommended
  10. Rather than managing activity lifecycle use Lifecycle to observe state changes
  11. Rather than keeping plain data with views, use LiveData to update views automatically. Use ViewModel to deal with screen rotation.
  12. Room is recommended in place of SQLite
  13. CursorAdapter and AsyncListUtil are discouraged. Use Paging instead with a neat, graceful offline use-case handling trick.
  14. Don’t do manual bitmap management. Use Glide, Picasso, or Lottie instead.
  15. Between TextureView and SurfaceView, use SurfaceView.
  16. Nine patches are discouraged. Use Vector Drawables.
  17. Use FusedLocationProviderClient for fetching the device location. Wi-Fi access triangulation is coming to Android P. FusedLocationProvider will eventually add support for that for indoor location tracking.
  18. MediaPlayer is discouraged, use ExoPlayer instead. A detailed hands-on presentation on ExoPlayer

Performance

  1. 42% of 1-star reviews mention crashes/bugs
  2. ANR/crash rate reduces engagement – use StrictMode to catch them early
  3. Avoid IPC on the main thread, StrictMode won’t catch the violation, and you would never know what’s happening on the other side of the IPC call which can block the main thread
  4. If BroadcastReceiver#onReceive is going to take more than 10 seconds, then call goAsync for background processing and call PendingResult#onFinish() once that’s finished
  5. WakeLocks – avoid using them. All except PARTIAL_WAKE_LOCK are deprecated with Android P.
    1. Use FLAG_KEEP_SCREEN_ON for keeping the screen on in an activity
    2. Use WorkMananger for background work
    3. Use AlarmManager for short-interval callback
  6. enums are not discouraged anymore. Platform code avoids it but unlike in prior Android versions, the penalty for enums is low now.
  7. A good introduction to Android’s display rendering
  8. A good introduction to Android’s text handling
  9. Text handling issues
    1. Only framework spans can be parceled, don’t mix custom spans with framework spans since only the frameworks will be part of the copied text
    2. After ~250 spans or more, SpannableStringBuilder ends up being more performant than SpannableString since the former internally uses trees.
    3. Metrics affecting spans cause measure-layout-draw calls, while appearance affecting spans cause layout-draw calls, therefore, the former is more expensive.
    4. Text measurement takes a lot of time on the UI thread, consider creating PrecomputedText on the background thread.
    5. android:autoLink = true works via RegEx and has bad performance. Consider using Linkify on the background thread. Android P also supports deep learning-based TextClassifier which is also invoked on the background thread.
  10. Testing your app for background restriction – adb shell apps set <package name> RUN_ANY_IN_BACKGROUND ignore # applies background restriction (change “ignore” to “allow” to remove restriction)

Next Billion Users

  1. 28% of searches in India are voice searches
  2. 2-wheeler mode added to Google Maps
  3. Google Tez uses Ultrasound for pairing and sending money to the nearby receiver
  4. Files Go – Folder-based hierarchy won’t work for users who have never had a PC before. Therefore, shows photos based on associations like “WhatsApp Images” or “Camera”. Supports P2P file sharing for fast transfers.
  5. Design for next billion users – http://design.google/nbu
  6. Android Go
    1. 25% of devices in 2018 shipped with <= 1GB RAM (target for Android Go)
    2. Every 6 MB app size reduces the install rate by 1%
    3. India – largest market for Go. The USA – is the second largest market for Go.
    4. 5 seconds cold start goal
    5. Users opt for smaller apk sizes with a lower rating.
    6. The average apk size is 30 MB. Go recommends a 40MB max app size for non-game and 65MB for game apps.

MLKit

  1. On-device + cloud APIs. On-device APIs are free.
  2. Firebase supports downloading models and even doing A/B testing.
  3. Experimental support to convert TensorFlow models to TensorFlow Lite models.

Compiler

  1. D8 – new Dexer, now default. Enable/disable via “android.enableD8 = true/false”
  2. R8 – new optimizer, now default replacing proguard, still opt-in in 3.2. Enable via android.enableR8 = true

Kotlin – talk can be here

  1. Use properties instead of default getters/setters
  2. Use data classes to generate equals, hash method, etc.
  3. Use default args instead of method overloading
  4. Use top-level functions as well as local functions (function inside functions for better encapsulation
  5.  Use function extensions to make the code more readable, eg. extend String class with isDigit to be able to later write the code like “1234”.isDigit
  6. Use smart casts
  7. Use sealed classes for a superclass which should not be extendable beyond the compile-time
  8. Use string interpolation in println, eg. println(“name is ${name}”)
  9. Use val (read-only values) by default, only use var (read-write variable) when there is a strong reason
  10. Declare lambda functions as inline to remove the cost of having an extra class
  11. Use co-routines via async instead of creating new threads
  12. Use suspend + async to convert callbacks into more readable synchronously written code

Demystifying Android rendering: Jank and ANR

Almost everyone developing an Android app has seen something like this in their device logs.

I/Choreographer(1200): Skipped 60 frames!  The application may be doing too much work on its main thread.

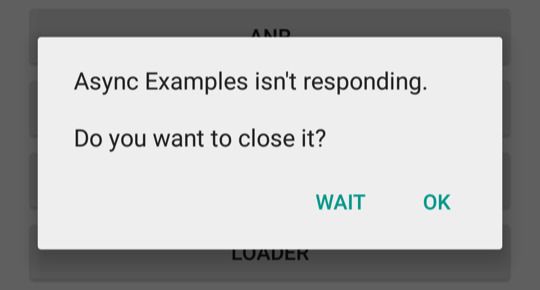
On most devices, the Android platform tries to render a new frame every 16 milliseconds (60 fps).   The rendering requires that whatever work is happening on the UI thread should finish in that timeframe (well, actually in less than that). Any unit of work (== Runnable) scheduled on the UI thread has to fit in that. When the work takes longer, then frames are skipped. One skipped frame is 16 ms of the hung screen. The UI looks janky and unresponsive and if the user interacts with the screen and the application does not respond in time (5 seconds) then Application Not Responding (ANR) shows up.

Another interesting scenario where the work can take longer is when the work involves acquiring a lock (for example, for executing synchronized code). Any synchronized code on the main thread is almost always a bad idea since you have no control over who could be holding the lock. And the developer writing the code to run on a background thread has no idea that holding a particular lock can cause any problems. Android has two tools to debug this. One of them is dumpsys for the statistical info; the other one is Method profiling via Android Device Monitor for identifying the culprits.

$ adb shell dumpsys gfxinfo com.google.android.gm
... 
Janky frames: 10337 (12.37%)
90th percentile: 17ms
95th percentile: 25ms
99th percentile: 69ms
...

And, by the way, Choreographer is the class that does the actual rendering work.


Built-in “Developer options” in Android

Android has a few really good settings built right into the platform for debugging under a hidden “Developer Options” menu. You can turn then on via Settings -> About Phone -> Build Number (tap 7 times). The steps will be similar but might vary a bit across OEMs. In older versions of Android, this used to be an explicit option under the Settings tab.

I find the following options to be useful for the development

  1. Don’t keep activities
    Android can destroy any activity which is not visible in the foreground at all. The destroy is a bit of a misnomer here since activity will be allowed to preserve its state (via saveInstanceState). This option allows you force that on all apps. It is harder to keep this option always on since many badly designed Android apps misbehave and even the good ones have a deteriorated performance due to repeated re-creation. I wish there was a way to force this only on the app under development.
  2. Force RTL layout direction
    to test your app’s look & feel in an RTL language like Hebrew or Urdu. This option is useful since it actually reveals evolving and varied behavior across different versions of Androidrtl_forced
  3. Profile GPU rendering
    Shows a nice cool graph of the load on the UI thread and when your app fails to render a frame in Android recommended a 16 milliseconds timeframe.

    Courtesy XDA

    Courtesy XDA

  4. Stay awake [while charging]
    when you don’t want your screen to turn off while it’s charging [& connected to your laptop for the development]. I wish Google actually provided “Stay awake while USB debugging” option.
  5. Verify apps over USB
    Disable it unless you don’t trust the app you are working on
  6. Pointer Location
    This option draws a set of perpendicular lines at the point of touch, useful to see if a set of views (like buttons, text fields etc.) align or not.
  7. Show Layout bounds
    shows the bounds of all the views, annoying to always keep on but useful for quick testing.
  8. Debug GPU overdraw
    Google recommends it but I have rarely seen any benefits of turning this on since due to animation, overdraw is almost always present.
  9. Running services
    You can check out your app and see if it is listed and is running some spurious service in the background.Running apps